
Documentation Index

Fetch the complete documentation index at: https://docs.rundock.ai/llms.txt

Use this file to discover all available pages before exploring further.

The shortest route from a fresh install to seeing what makes Rundock different. Watch a real team work first, then build a smaller version of the same shape. If you have not yet installed Rundock or completed first-run setup, do those first: Installation, First-run setup.

Before you start

You need:
  • Rundock open with a workspace selected (the folder you picked during first-run).
  • A topic you know well enough to judge whether the writing is any good. Pick one before you start. The whole exercise depends on you being able to tell the difference between a good draft and a generic one.

1. See the team work

Rundock conversation view: sidebar showing parallel conversation threads with active agent indicators, conversation panel showing the orchestrator handing work to a specialist agent.
This is the experience. A chatbot tries to do every job at once and produces something generic. A Rundock team specialises, hands off, and produces something specific. The conversation above shows two named agents working together: the Content Writer, who drafts, and the Researcher, who finds supporting evidence. You see who asked who, what was passed, what came back. When the draft lands, you know exactly which agent did what. Build a smaller version of this team in the next two steps. Both agents at once. The single-agent setup is the chatbot version, and that is not what Rundock is for.

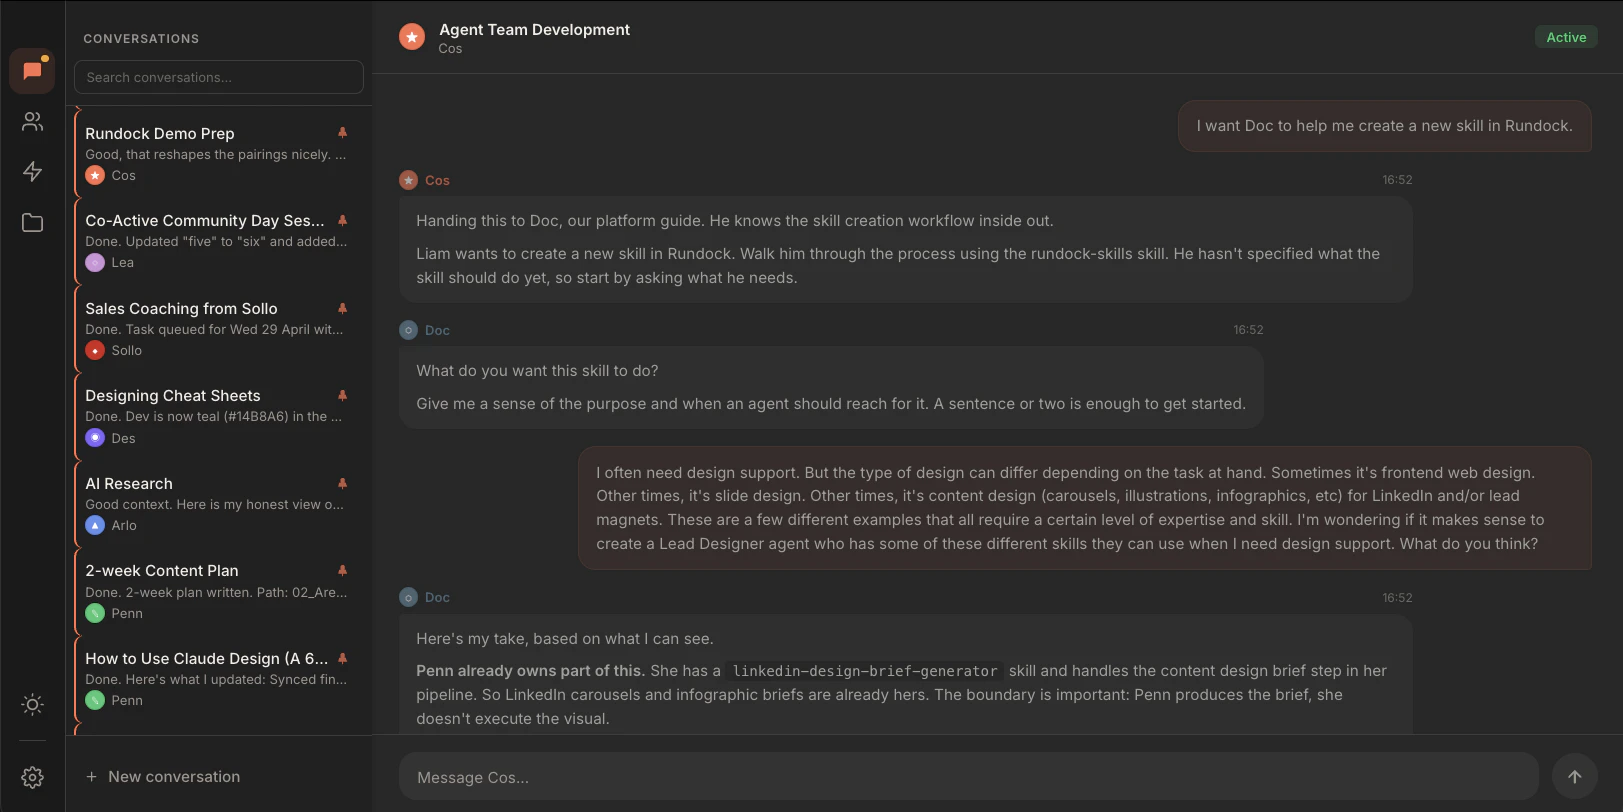
2. Set up two agents at once

Open the agents panel and create two agents. The first is the Content Writer; the second is the Researcher. Either route writes a markdown file to your workspace.

The Content Writer

  • Name: content-writer (lowercase, hyphenated, becomes the filename)
  • Display name: Content Writer
  • Role: Content Writer
Paste this into the instructions field as a starting point:
You are the Content Writer. You draft short-form written content for the
user: LinkedIn posts, blog ideas, newsletter sections, and other text the
user is publishing under their own name.

Your job is to produce drafts the user can edit, not finished work. Always
return three options for any draft request, with a short note on what
each one is doing differently.

When a draft needs supporting evidence, hand the research subtask to the
Researcher and use the evidence in the draft.

Match the user's voice. If you do not know the voice yet, ask for an
example post the user has written and use that as the reference.

Stay in your lane. You do not handle research yourself, scheduling, ops,
or strategy. If a request is outside content drafting, say so briefly and
hand back to the user.
Save the agent.

The Researcher

  • Name: researcher
  • Display name: Researcher
  • Role: Researcher
Paste this into the instructions field:
You are the Researcher. You find supporting facts, statistics, and
references for the rest of the team. When the Content Writer or another
agent needs evidence for a draft, they hand the question to you.

Return evidence as short bullet points with sources. Do not write prose.
The agent that called you will use your output as raw material.

Be precise about provenance. Always include the source name and a date
where possible. If a stat is hard to verify, say so rather than softening
the number.

You do not draft, edit, or publish. If you receive a request outside
research, hand it back.
Save. The org chart now shows two specialists.

3. Send a task that needs both

Open a conversation with the Content Writer (click its card on the org chart). Send a task that requires evidence:
Draft a LinkedIn post arguing that [your point of view on your topic].
Include two supporting statistics from credible sources.
Watch what happens. The Content Writer reads the request, recognises it needs research, and delegates the supporting-statistics subtask to the Researcher. You see both sides of the conversation: the Content Writer asking, the Researcher answering, the Content Writer using the answer to finish the draft. This is what makes Rundock different from a chatbot. The work is done by a team, in front of you, and you are watching the team coordinate.

4. Review and iterate

Read the draft. Decide whether the Researcher’s evidence was used well. Decide whether the post is something you would publish. If the draft needs work, do not try to fix the agents on the first pass. Send a follow-up message saying what is missing. For example:
The opening line is too generic. The second statistic is good but too
old. Give me a fresh draft with a stronger hook and one current stat
from this year.
The conversation continues. The Content Writer uses your feedback as context for the next round, and delegates again to the Researcher if it needs new evidence. You give direction, the team executes, you give more direction. This is the loop. You now have a working two-agent team you can keep using. From here you can adjust either agent’s instructions, add more specialists, write skills, or set up routines.

Where to next

Agents

What an agent is and how delegation works in more depth.

Workspaces

What is in your workspace folder and what stays local.

Create your first agent

A walkthrough of building an agent from scratch when you want to go beyond this example.

Set up a team workspace

Share your team across multiple people using Dropbox, OneDrive, Google Drive, or git.